> For the complete documentation index, see [llms.txt](https://docs.ozone.one/ozone-end-user-guide/llms.txt). Markdown versions of documentation pages are available by appending `.md` to page URLs; this page is available as [Markdown](https://docs.ozone.one/ozone-end-user-guide/documentation/setup/setting-up-environments.md).
# Setting up Environments
## Environments
Environments are abstractions, where the intent is as follows:
1. Secrets (Variables) can have environment-specific values if you wish to choose so.
2. Clusters can be mapped to an environment, thus creating a gate for CI/CD executions.
3. Microservices can have access to specific environments to prevent any unintentional deploys to any environment.
### Steps to Create an Environment
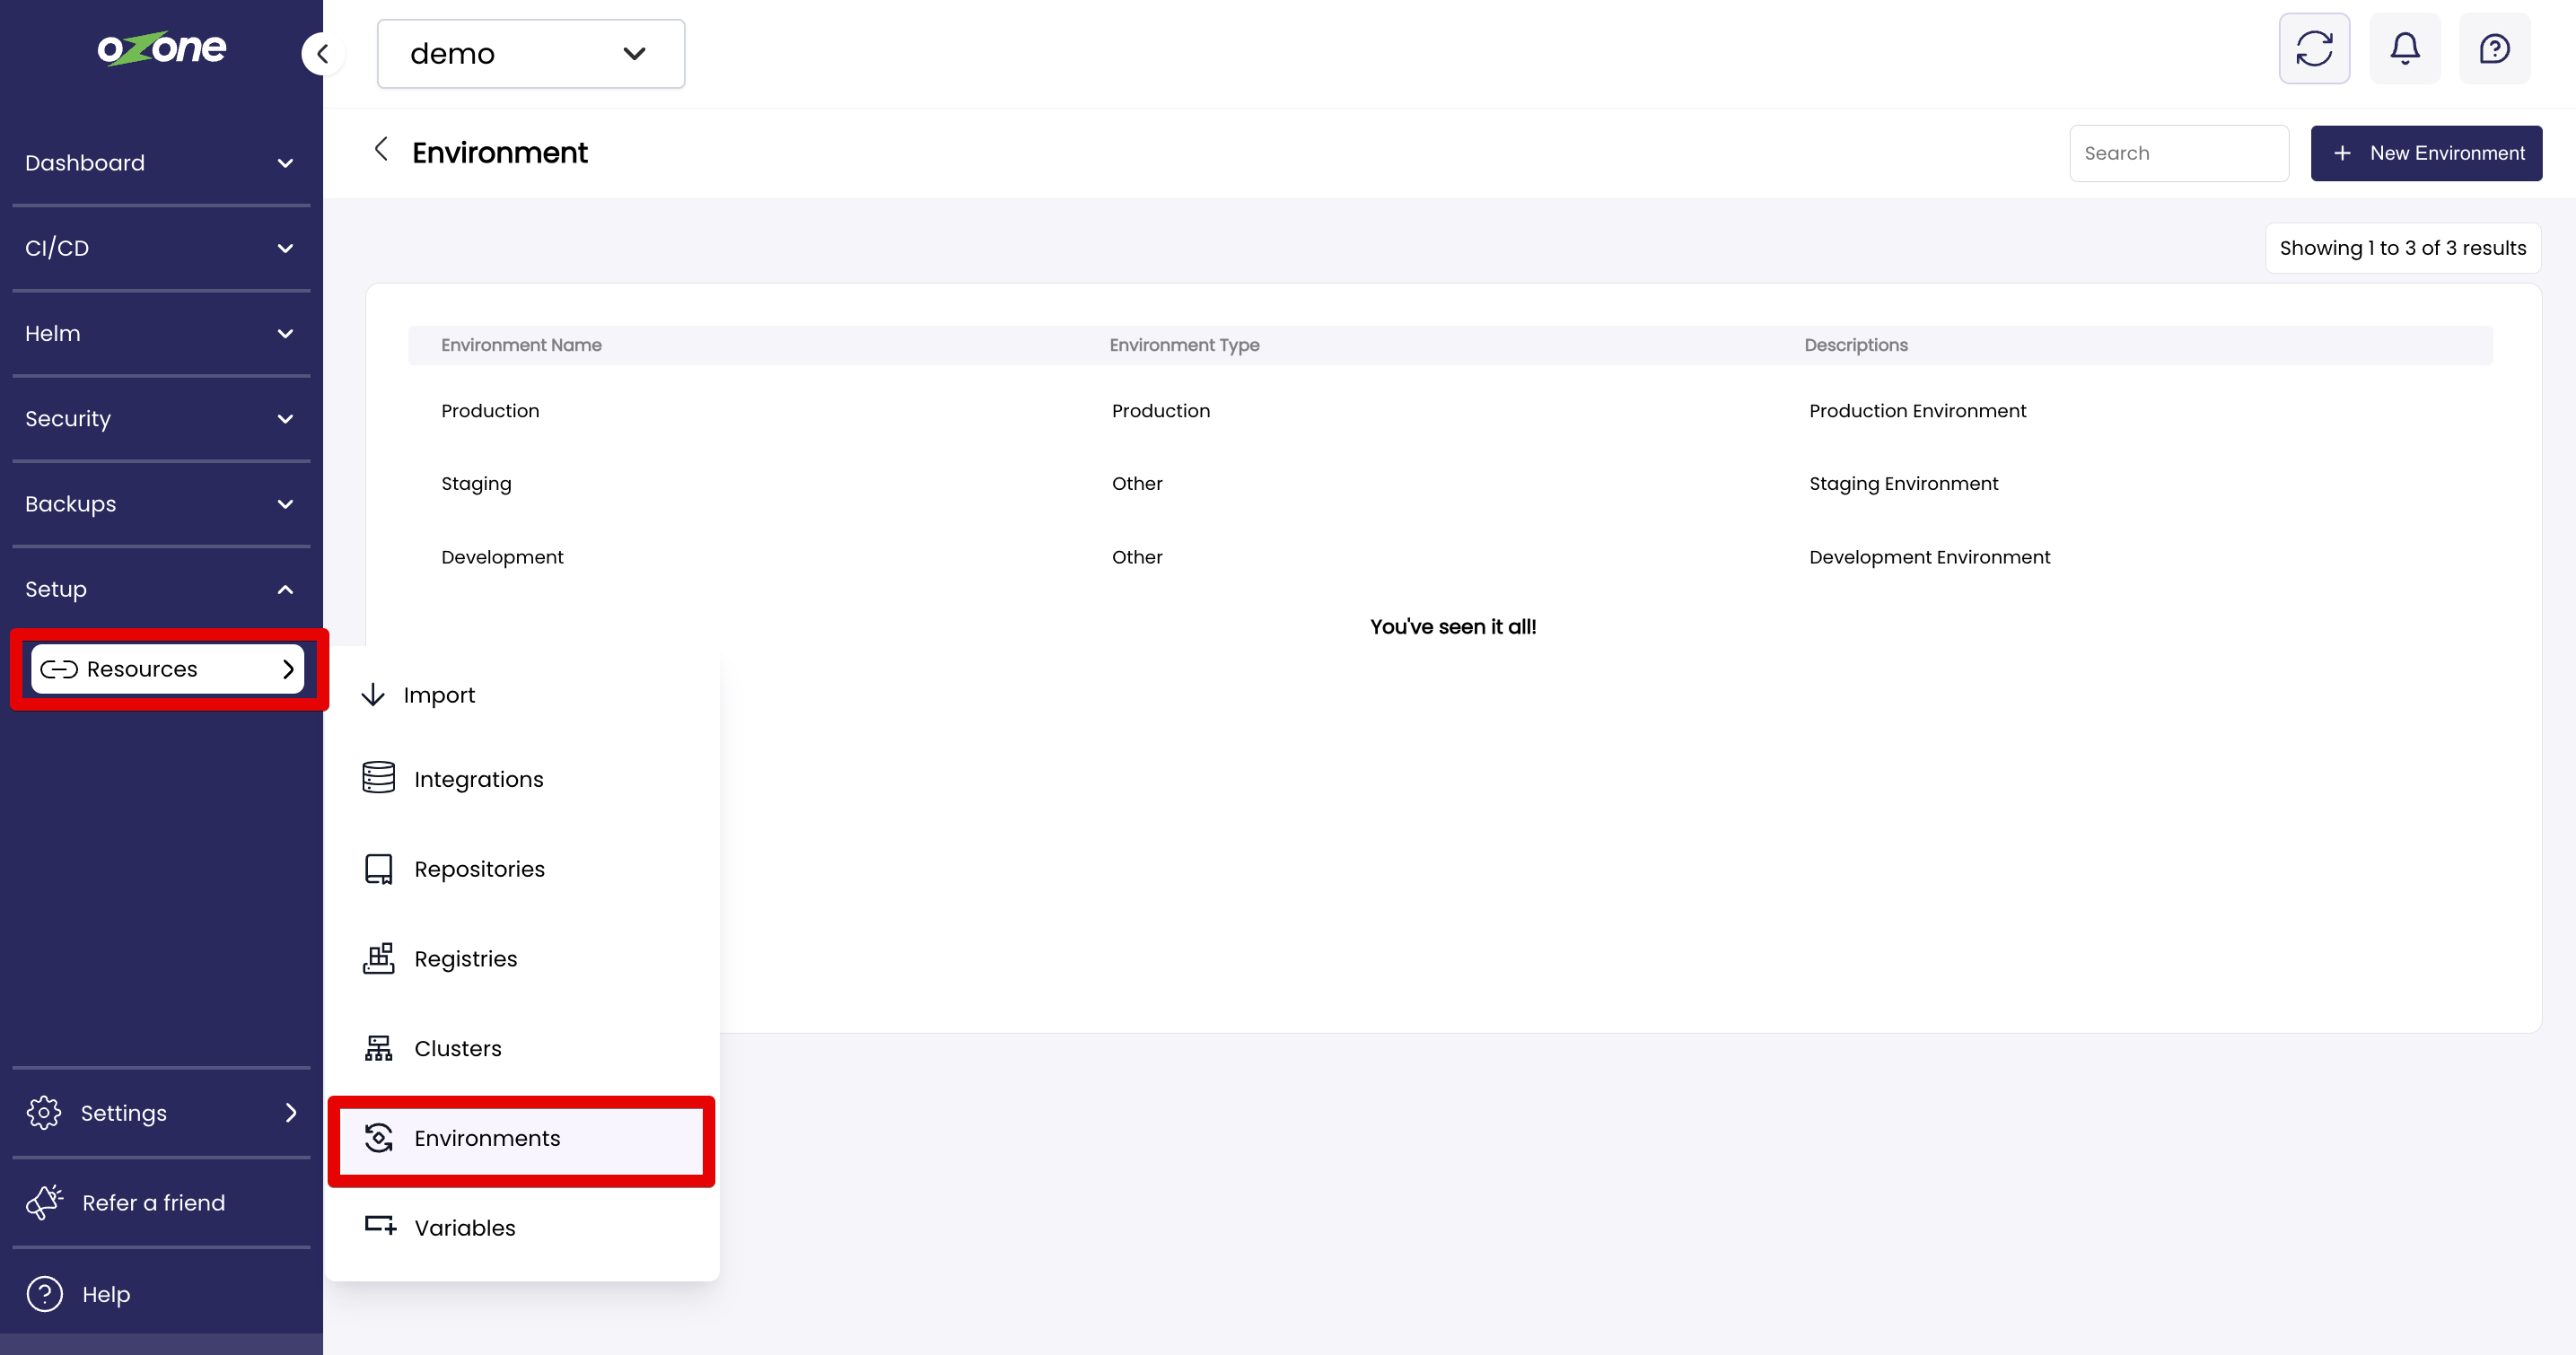
1. Once you log in to Ozone, select **Resources** on the left-side bar under **Setup**. After clicking on Resources a menu appears, click on **Environments** to open the new modal window.
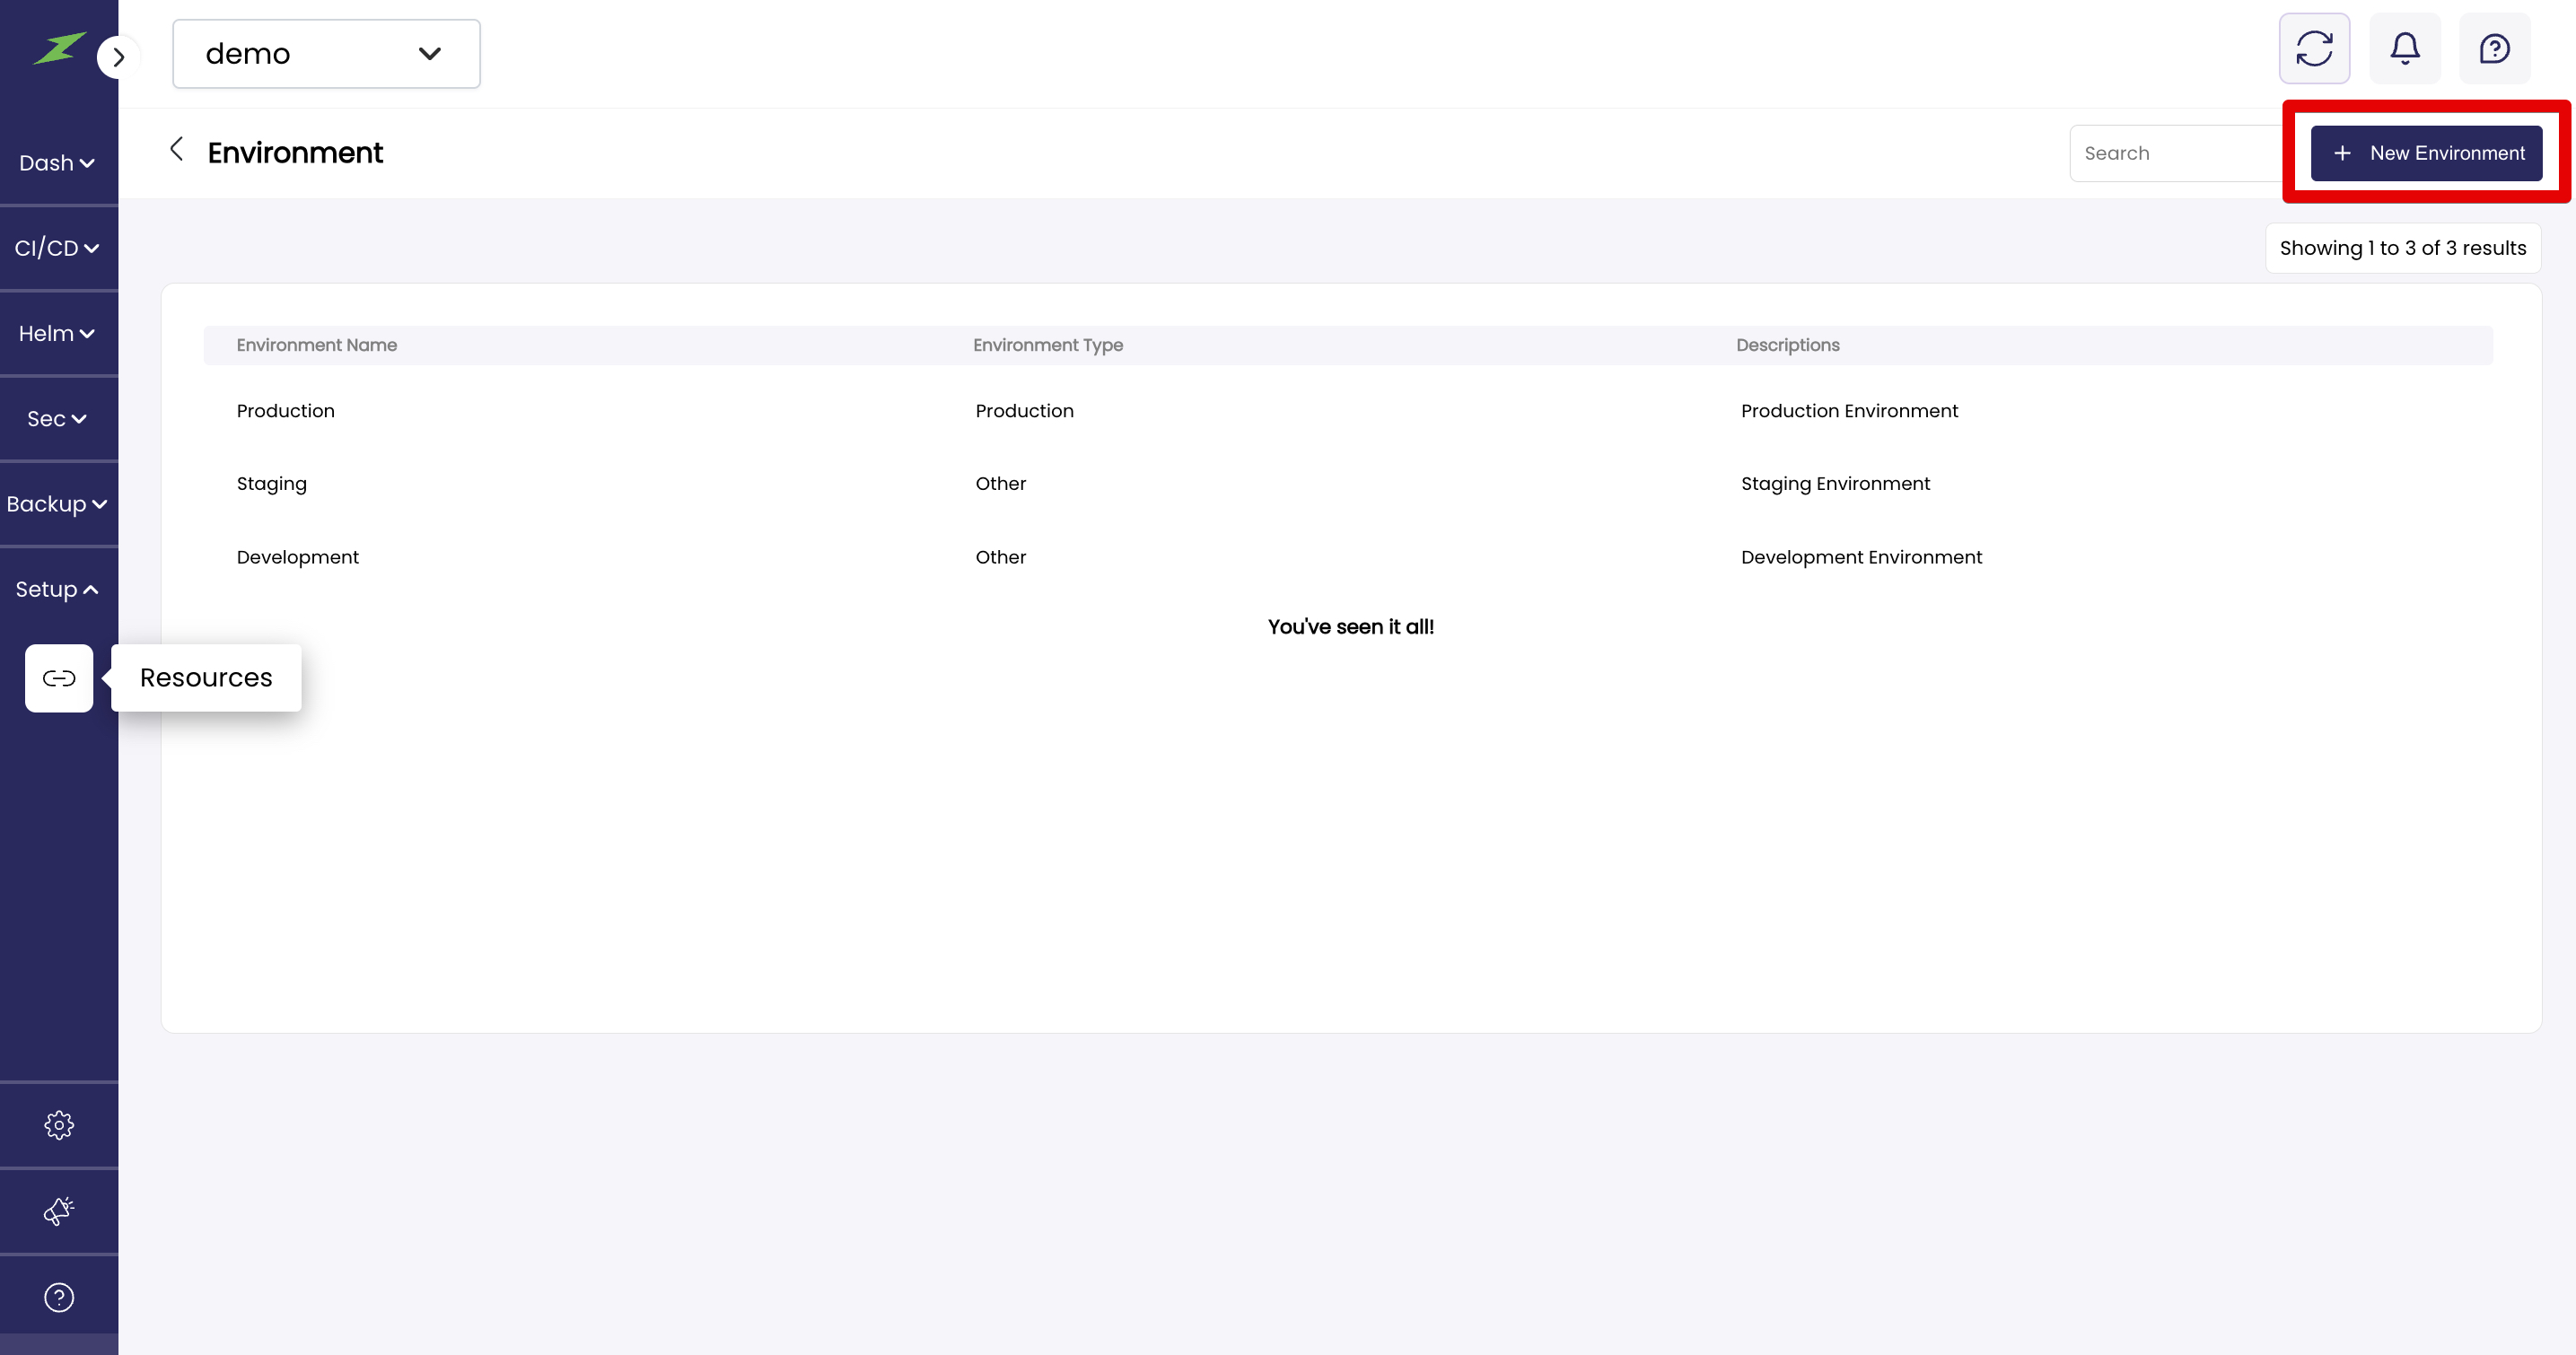
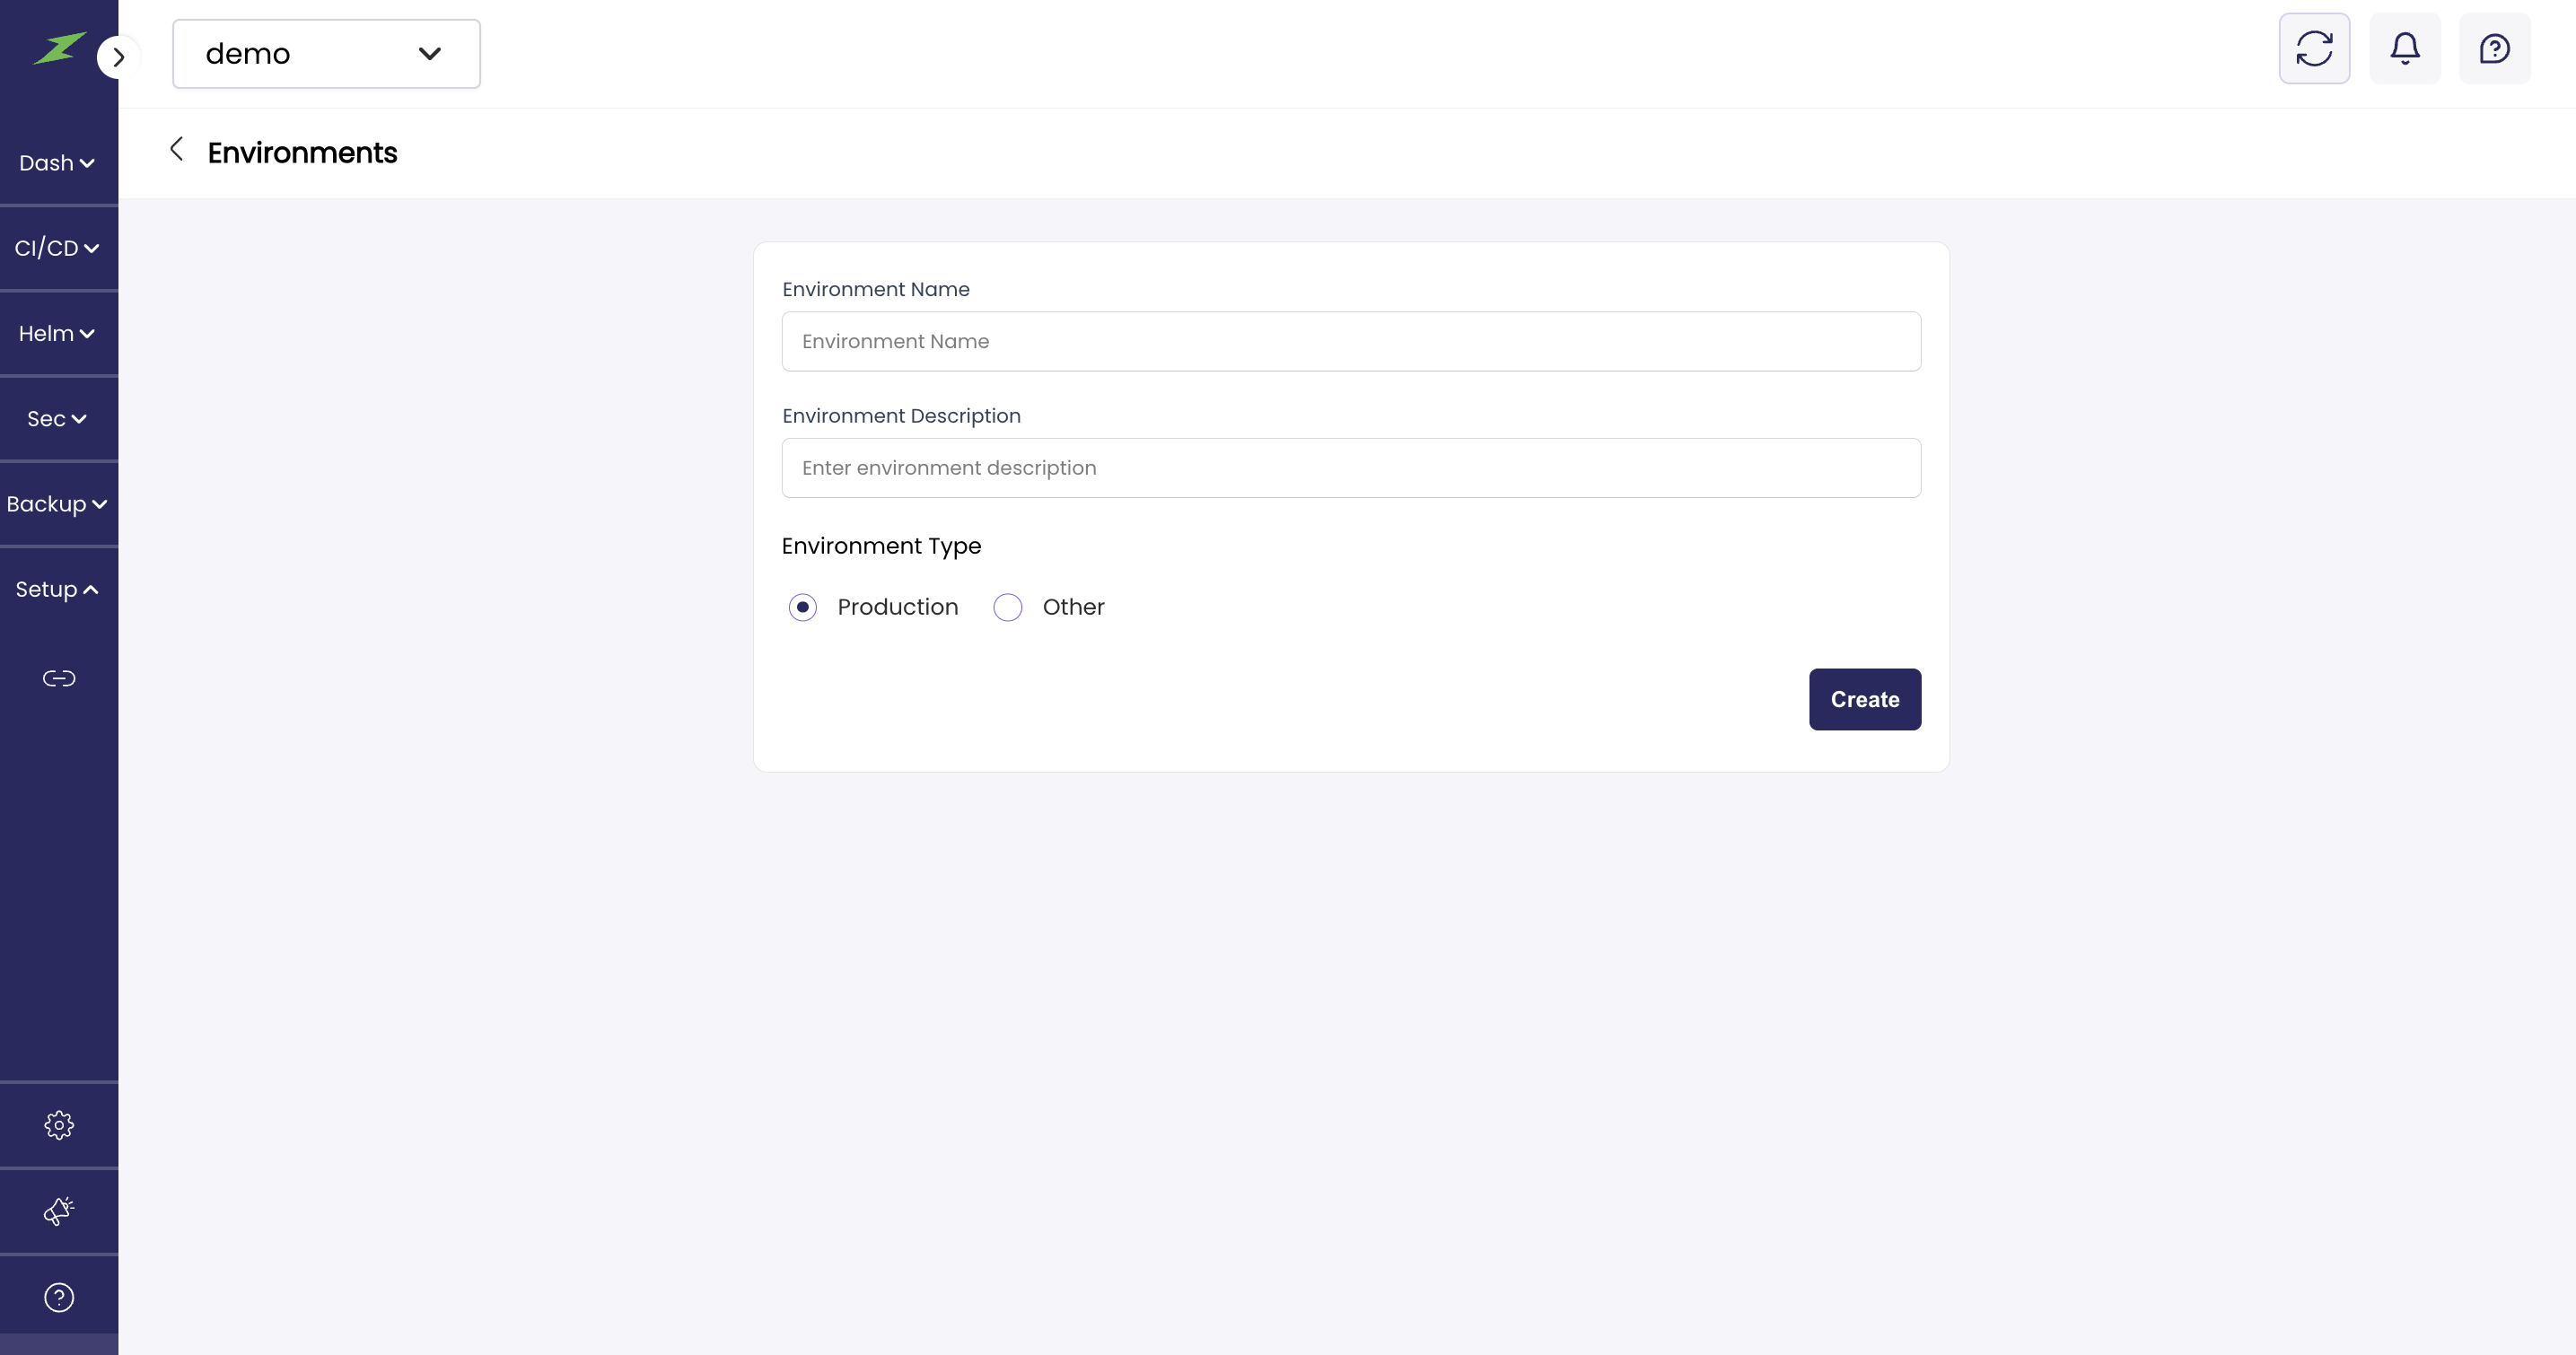
2. After this users can click on the **+ New Environment** button to open the modal window for an Environment creation.
3. The user can select the environment type according to their use-case, by clicking on the given options.
4. Once the necessary details are filled the user can click on create.
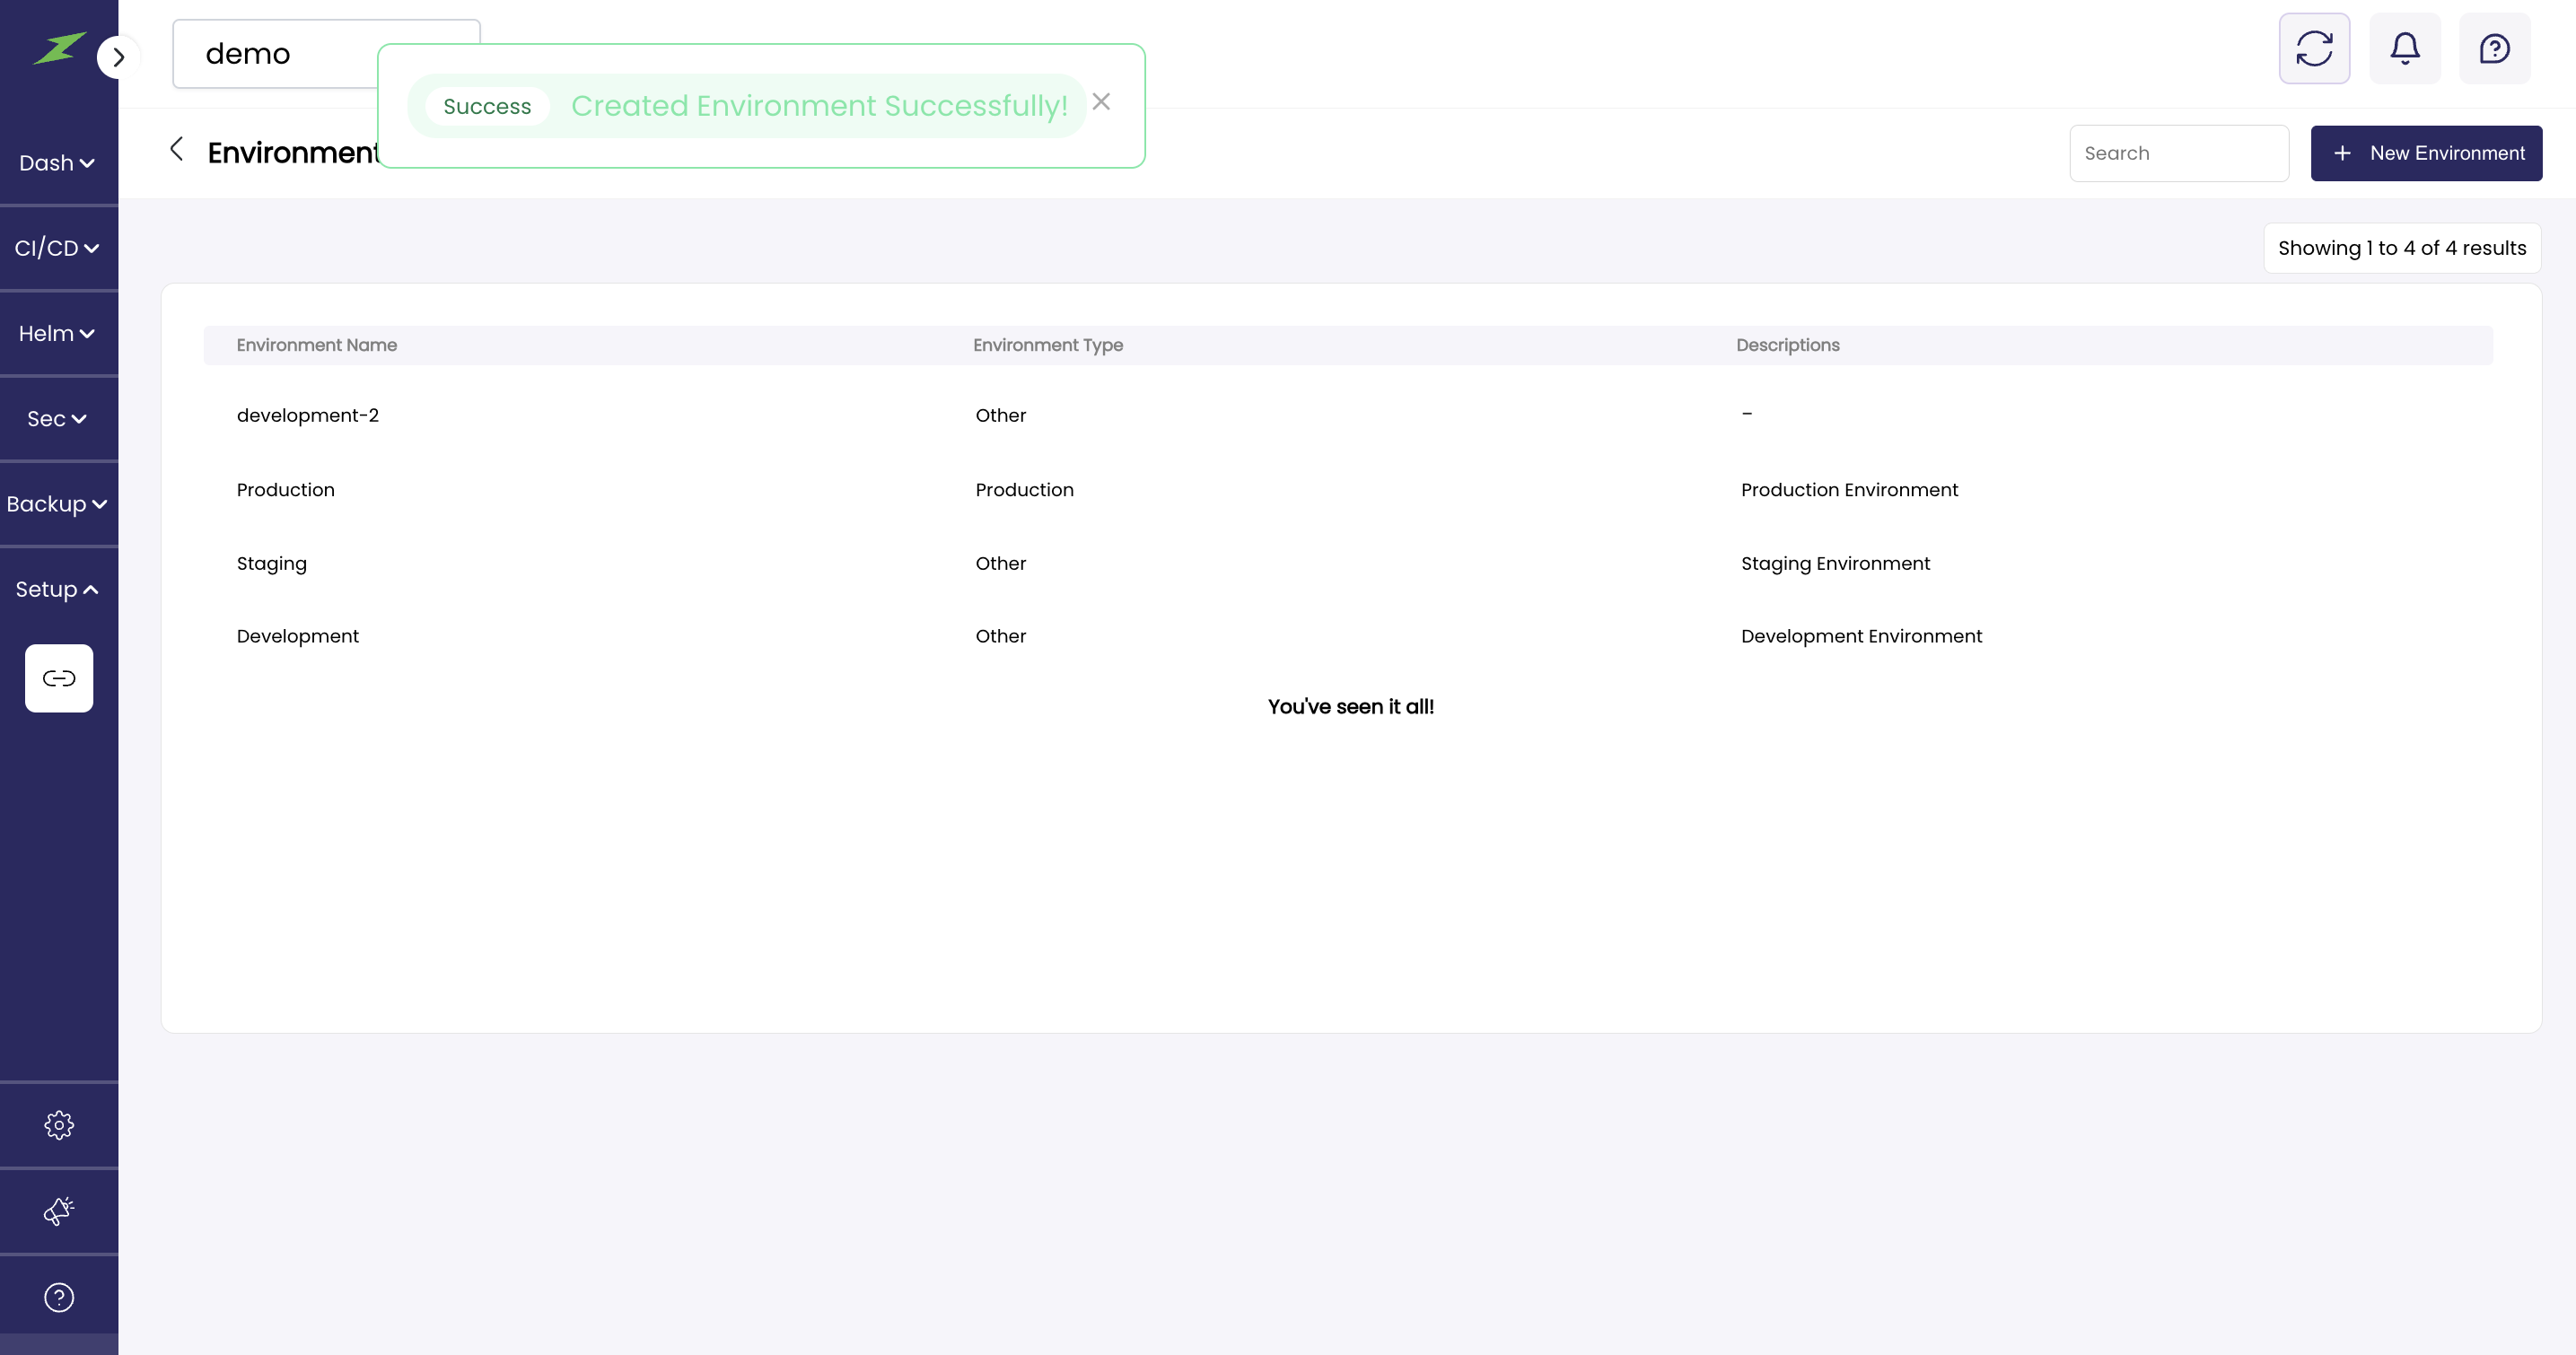
5. Once the Environment is Successfully been created it will be shown in the form of a tabular list, as shown below. In the table list, you can see what type of environment is created.